
Introduction
The creamy sweetness of a perfectly scooped cone, the joy of creating something delicious from scratch, and the satisfaction of knowing exactly what goes into your dessert—this is what homemade ice cream is all about! While store-bought ice cream has its charms, there’s nothing quite like the taste and reward of making it yourself. But let’s admit it: homemade ice cream isn’t always a walk in the park.
Between the churning, the waiting, and the occasional flop, it can feel like a recipe for frustration. But here’s the good news: with the right techniques, you can create creamy, flavorful homemade ice cream like a pro. Today, I’m sharing my top 5 hacks to take your homemade ice cream game to the next level. Whether you’re a beginner or a seasoned ice cream lover, these tips will have you making scoop after perfect scoop in no time.
And if you’re already a fan of my Classic Vanilla Cake recipe, you’ll love how these hacks elevate your homemade ice cream game just as much. So grab your mixing bowl, and let’s dive in!
Table of Contents
Key Takeaways:
- Solve Common Ice Cream Issues: Achieve creamy, smooth homemade ice cream by using stabilizers like cornstarch and avoiding over-churning.
- Enhance Flavor and Texture: Chill the base, experiment with unique flavors, and add mix-ins strategically for the best results.
- Cost-Effective and Customizable: Save money and create personalized flavors with mix-ins like chocolate, fruit, and nuts.
- Perfect Every Batch: With these hacks, anyone can make professional-quality ice cream at home, ensuring delicious results every time.
What is Homemade Ice Cream Hacks?
Ever wondered why homemade ice cream doesn’t always turn out as smooth and creamy as store-bought? Maybe you’ve even asked yourself, “Why bother when I can just buy a tub at the grocery store?” Well, my friend, let’s flip that script. Homemade ice cream hacks are all about solving those pesky problems that stand between you and the perfect scoop.
The name “homemade ice cream hacks” might sound a bit quirky, but trust me, it’s anything but. These are tried-and-true techniques that simplify the process, save time, and ensure your homemade ice cream is nothing short of extraordinary. And let’s not forget the classic saying: the way to a man’s heart is through his stomach. So why not win over the hearts of your family and friends with a batch of creamiest, most flavorful ice cream they’ve ever tasted?
Ready to give it a try? Let’s get started!
Why You’ll Love This Homemade Ice Cream Hacks
Creamy, Dreamy Results: Say goodbye to icy, grainy textures and hello to the creamiest homemade ice cream you’ve ever made. These hacks ensure every batch is smooth, rich, and indulgent.
- Budget-Friendly: Making homemade ice cream is cost-effective in the long run, especially since you can customize it with your favorite flavors and ingredients. Plus, no more overpriced store-bought tubs!
- Flavor Flexibility: Whether you’re a chocolate lover, a fruit fanatic, or a nutty fan, these hacks allow you to experiment with endless flavor combinations. Add mix-ins like caramel, sprinkles, or even cookie dough for an extra-special treat.
And if you’ve already tried my One-Hour Chocolate Mug Cake, you know how much I love recipes that are both easy and impressive. This homemade ice cream hack delivers the same—effortless yet extraordinary.
Ready to churn out your best batch yet? Let’s dive into the tips!
How to Make Homemade Ice Cream Hacks
Let’s break this down into simple, actionable steps so you can start making your best homemade ice cream ever.
Quick Overview
Making homemade ice cream doesn’t have to be complicated. With the right techniques, you can churn out a batch in about 30 minutes (plus freezing time). The result? A dessert that’s creamy, customizable, and perfectly sweet.
Key Ingredients for Homemade Ice Cream Hacks
Here’s what you’ll need for the base recipe:
- 2 cups heavy cream
- 1 cup whole milk
- 1⁄2 cup granulated sugar
- 1 tsp vanilla extract (or your preferred flavor)
- Pinch of salt
For optional mix-ins, you can use:
- Chocolate chips
- Fresh fruit (berries, strawberries, etc.)
- Nuts (like walnuts or almonds)
- Candy pieces (like M&M’s or chopped candy bars)
(Note: Adjust the quantities of mix-ins based on your preference.)
Step-by-Step Instructions
- Prepare Your Base: In a large mixing bowl, combine the heavy cream, whole milk, sugar, vanilla extract, and salt. Whisk until the sugar is fully dissolved.
- Chill the Base: Cover the bowl with plastic wrap and refrigerate the mixture for at least 2 hours or overnight. This step ensures your ice cream churns to the creamiest consistency.
- Churn the Ice Cream: Pour the chilled base into your ice cream maker and churn according to the manufacturer’s instructions. Most ice cream makers take about 20-30 minutes to churn a batch.
- Add Mix-Ins: During the last 2-3 minutes of churning, add your mix-ins. This ensures they’re evenly distributed throughout the ice cream.
- Freeze and Set: Transfer the churned ice cream to an airtight container and freeze for at least 2 hours to set. This will give it a scoopable consistency.
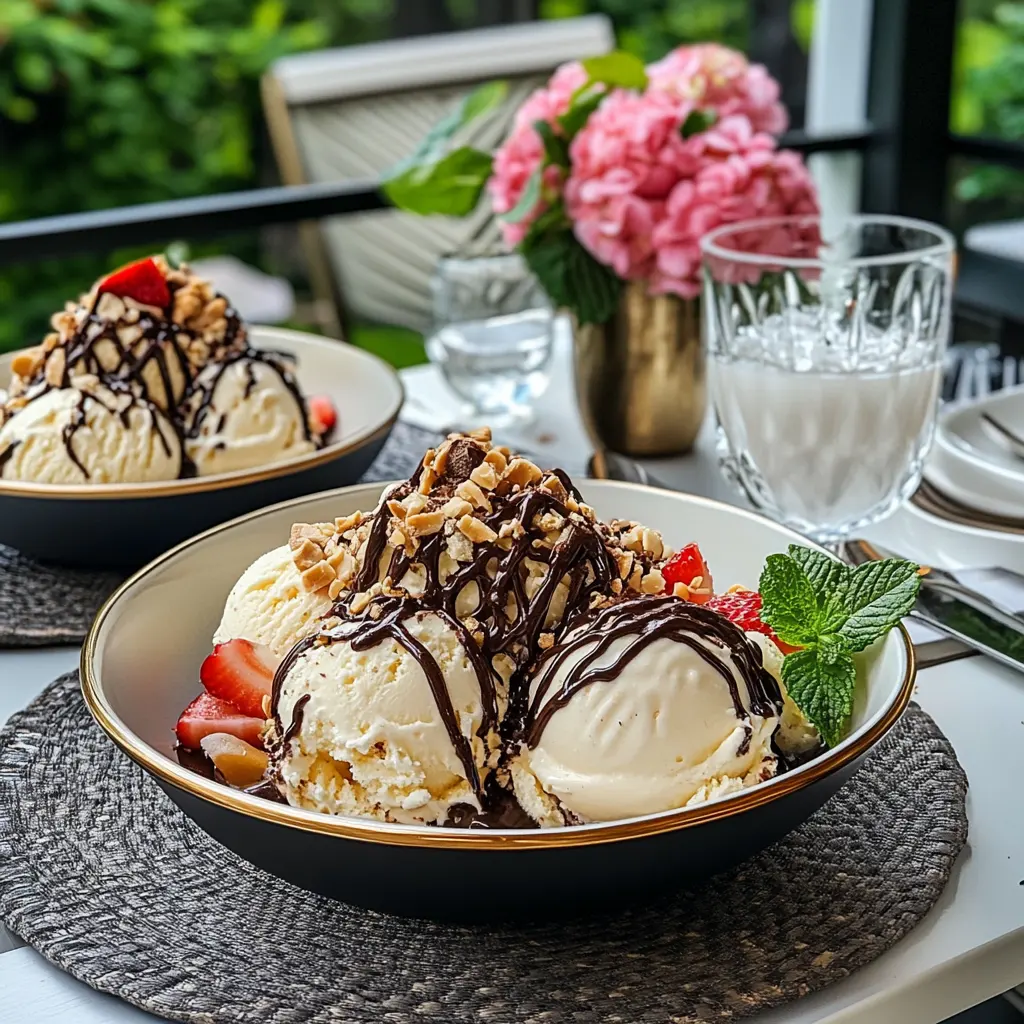
What to Serve with Homemade Ice Cream
Homemade ice cream is a versatile treat that pairs perfectly with:
- Fresh fruit (like strawberries or blueberries)
- Warm brownies or cookies
- Caramel or chocolate sauce
- Toasted nuts for added crunch
- A drizzle of honey or maple syrup
For a fun family-friendly dessert, try serving it alongside my Quick Strawberry Shortcake recipe for a match made in heaven!
Top Tips for Perfecting Homemade Ice Cream Hacks
- Use a Water Bath: To prevent the ice cream base from heating up while churning, place the mixing bowl in a larger bowl filled with ice and water. This keeps the temperature low and ensures a smooth texture.
- Add a Stabilizer: For a creamier texture, add 1-2 tablespoons of cornstarch or unflavored gelatin to the base before churning. These act as stabilizers and prevent ice crystals from forming.
- Don’t Over-Churn: Stop the churner as soon as the ice cream reaches a soft-serve consistency. Over-churning can lead to a too-hard or icy texture.
- Experiment with Flavors: Try infusing your ice cream base with unique flavors like coffee, mint, or citrus zest. For example, add a handful of fresh mint leaves for a refreshing mint chip ice cream.
- Aging the Base: For a more robust flavor, let the base age in the fridge for 24 hours before churning. This allows the flavors to meld and develop.
Storing and Reheating Tips
- Storing: Transfer the churned ice cream to an airtight container and store it in the coldest part of your freezer. For the best texture, consume within 3-5 days.
- Reheating: If the ice cream becomes too hard, let it sit at room temperature for 5-10 minutes before serving.
Conclusion
Homemade ice cream hacks are all about taking a classic recipe and making it even better. With these simple tips and tricks, you’ll be on your way to crafting batches that are creamier, tastier, and more customizable than ever before.
Whether you’re a pro in the kitchen or just starting out, these hacks empower you to create the best homemade ice cream of your life. So go ahead, give them a try, and enjoy the sweet satisfaction of scooping your very own creamy masterpiece.
Happy churning!
You might also like

Homemade Ice Cream Hacks: 5 Must-Try Techniques Today
- Total Time: PT30M
- Yield: 1.5 quarts (approximately 12 servings) 1x
Ingredients
-
- 2 cups heavy cream
-
- 1 cup whole milk
-
- 1⁄2 cup granulated sugar
-
- 1 tsp vanilla extract (or your preferred flavor)
-
- Pinch of salt
For optional mix-ins, you can use:
-
- Fresh fruit (berries, strawberries, etc.)
-
- Nuts (like walnuts or almonds)
-
- Candy pieces (like M&M’s or chopped candy bars)
Instructions
-
- Prepare Your Base: In a large mixing bowl, combine the heavy cream, whole milk, sugar, vanilla extract, and salt. Whisk until the sugar is fully dissolved.
-
- Chill the Base: Cover the bowl with plastic wrap and refrigerate the mixture for at least 2 hours or overnight. This step ensures your ice cream churns to the creamiest consistency.
-
- Churn the Ice Cream: Pour the chilled base into your ice cream maker and churn according to the manufacturer’s instructions. Most ice cream makers take about 20-30 minutes to churn a batch.
-
- Add Mix-Ins: During the last 2-3 minutes of churning, add your mix-ins. This ensures they’re evenly distributed throughout the ice cream.
-
- Freeze and Set: Transfer the churned ice cream to an airtight container and freeze for at least 2 hours to set. This will give it a scoopable consistency.
Notes
- Mix-ins Increase Values: Adding mix-ins like chocolate chips, nuts, or candy will increase calories, sugar, fat, and sodium.
- Estimates: Nutritional values are estimates and may vary based on specific ingredient brands and quantities.
- Serving Size: Calculated per 1/12 of the recipe.
- Prep Time: PT30M
- Category: Dessert
- Cuisine: American
Nutrition
- Serving Size: approximately 12 servings
- Calories: 3,600 kcal
- Sugar: 64g
- Sodium: 200mg
- Fat: 200g
- Saturated Fat: 120g
- Unsaturated Fat: 56g
- Trans Fat: 0g
- Carbohydrates: 200g
- Fiber: 0g
- Protein: 24g
- Cholesterol: 200mg
Keywords: homemade, ice cream, dessert, creamy, sweet, easy, summer treat, customizable